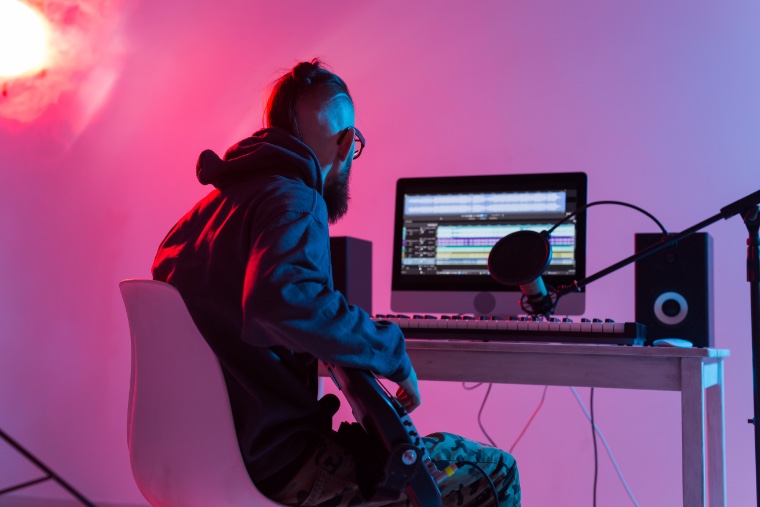
Creating music isn’t rocket science, but it does take a considerable amount of time, effort, and skill. It also requires good equipment, but more on that later.
As an indie musician, your goal is to produce music straight from your soul. However, no matter how profound your lyrics and beautiful your melodies are, low-quality tools will ruin your music. Listeners will focus more on the terrible sound quality rather than the lyrics you worked so hard on. Many might not even finish the whole song, and for many musicians, that’s painful.
Luckily, you no longer have to suffer from bad recordings in the future. So as long as you check out these tips on improving your music’s sound quality.
- Have Basic Gear
Up-and-coming professionals invest in good equipment. You might be thinking that everything you need has to be expensive. On the contrary, you can start with great tech for a low price.
Aside from a laptop or a desktop computer, some of the fundamentals you need as an indie music producer are:
- Digital audio workstation (DAW) software
- Microphone/s
- Headphones
- Audio interface
- Pop filters
- Studio monitors
You can find affordable versions by canvassing around and even asking friends who have music experience. Thus, always read reviews on products if you need to be extra sure about what you’re getting. Many musicians will happily put out their thoughts on equipment online, just like HiFi Hippo, where you can read product comparisons and anything about audio and music.
Once you’ve got your footing and your finances are in check, you could eventually level up to better, pricier equipment for improved production.
- Record In A Dedicated Studio
Let’s face it; you’re not going to record good music when you’ve got pets and housemates around. Your high-end microphone might be so good that it’ll pick up the softest noise you don’t want in your songs.
Before you press ‘record,’ look around the room you’re working in first. Remove anything that can reflect sounds, like drywall, plaster, and tiles. If there’s no way for you to take these off, you can settle for soundproofing objects like tapestries, thick blankets, and comforters to line the walls. In addition, you can install sound-absorbing foam panels like the ones professional studios have when you have the budget.
While you’re still a beginner indie musician, you might settle on recording your music in your bedroom and hope for the best. And that’s fine! If your current room is too big, that may cause outside noise to get recorded. Try recording in a smaller place like a storage room or a closet. All you need is to check for a few noisy suspects such as:
- Appliances (electric fans, refrigerators, etc.)
- Open windows
- Phones and other gadgets
- Cars
The first three suspects are easy to deal with. The fourth one, however, is a little tricky. Try recording your music at night when cars are less likely to pass by. You’ll also benefit from the night’s silence since most people are already asleep by this time.
- Know Where Your Speakers Should Be
When you’re testing out your music, it won’t make sense to have your speakers in another room (unless you’re testing for how loud a song can go). Standard rooms can’t ‘show’ you the true quality of music the same way professional studios do. But if you position your speakers correctly, you’ll get a good idea of how your produced music turned out.
Have your monitor speakers face the longer sides of a rectangular room. The bass will sound much better and more even. The goal is to create an equilateral triangle using the speakers and the listener.
If you hear some issues, consider that it may be due to the room you’re working in and not the actual production. So, avoid tweaking your song too much. It could also be your speakers themselves. Your current speakers might be too out of shape, and you may need to invest in professional monitor speakers to get some great sound out every time.
- Check Your Recording Process
You could have the best equipment in the best room yet still have low-tier quality sounds. Maybe it’s caused by how you’re recording your music.
When recording your voice, make sure you’re singing directly in front of your microphone. Even a little bit of distance can drastically alter the sound input. Be as close to it as possible, as if you’re almost kissing it. A pop filter attached will also remove any plosives coming out of your mouth as you sing so close to the microphone.
When recording musical instruments live, you’ll have to adjust the microphone slightly depending on what you’re playing. Here are two common instruments used in music and record them properly.
- Guitars
You can have the mic in one of two places: one is right in front, between the body and the neck to focus on the strings, and the other is facing the soundhole a few centimeters away.
- Drums
Typical setups for recording drums require more than one microphone, but you could still work well with at least four. Have the first facing the snare, the second facing the kick drum, and the last two overhead to capture most of the sound as you play.
Your goal is to get the best possible sound you can. Make as much music as you can, the best that you can. ‘Perfect’ shouldn’t even be included in an artist’s vocabulary, as perfection can suck the life out of you and your art.
Ready For Recording
As an indie music producer, you’re not expected to get stellar results, but you can learn from your mistakes. And as you continue to produce songs for yourself and others, you gain more knowledge in the craft and experience. Soon, you’ll be getting your name out there as a producer who makes quality music every single time.


